USER GUIDE
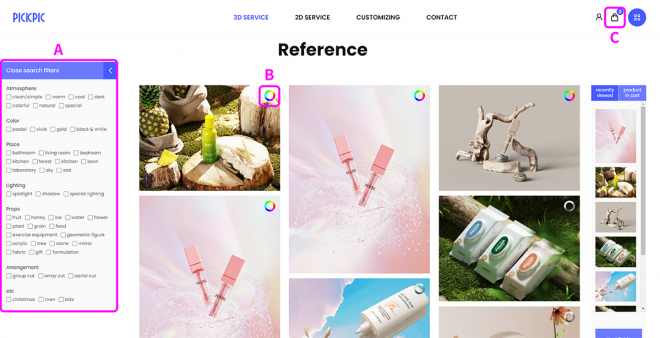
Select photo
(A) The FILTER function enables you to find easily a photo of your desired conditions.
(B) If the color gradation icon is located at the right of a photo, it is an image allowing the change of background color.
(C) Once you
select all photos, select the cart on the upper right of the screen, and move
them to it.
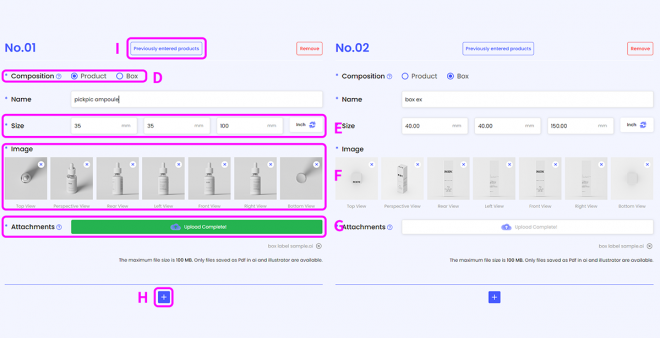
Enter product information
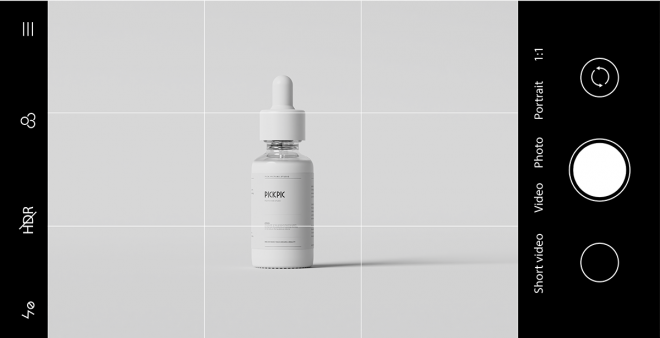
(D) Take a picture after selecting composition.
Enter the correct product name. An estimate sheet is issued after product quantity is counted on the basis of this product name. Different spelling or word spacing results in recognition as a different product by the system.
(E) The product size can be entered in inch or mm. Carry out accurate measurement, and enter in the order of height, width, and length.
(F) It is required to enter all of seven product images, i.e., the front, rear, left, right, upper, lower, and perspective images of the product. Accurate modeling is possible when there is no distortion.
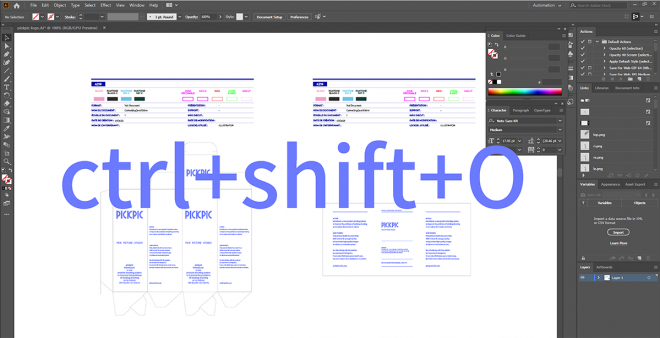
(G) Attach a product print file that has the .ai or .pdf extension and has completed font outline processing. You cannot modify the file once photography is started.
(H) You can enter several products, using the + icon. You should enter all information about your product including the product and a box.
(I) Once information is entered, the function of Import Product Information can be used in other scenes. Inputting wrong product information or omitting product information makes photography progress impossible.
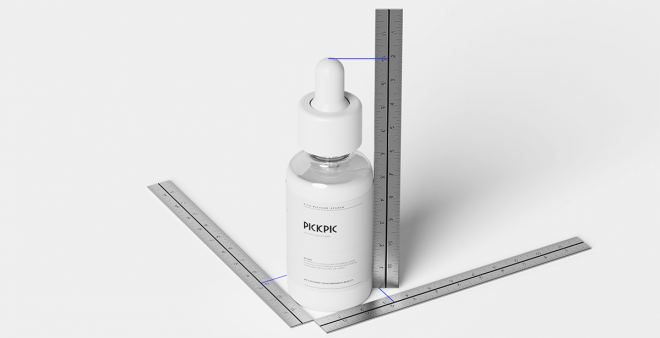
Measure product size
(E) Measure with a ruler the height, width and length of a product you want to photograph.
Take product photos
(F) Take product photos and attach them.
Distortion does not occur only when upper, lower, left, right, front and rear photos are photographed at a good distance from the front.
Take the perspective photo from an angle that can show the features of the product well.
-
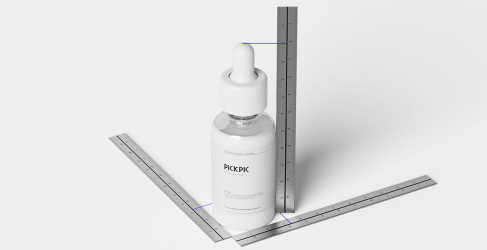
Measure product size
(E) Measure with a ruler the height, width and length of a product you want to photograph.
Upload label file
(G) Attach a design file to be used for product label printing to the attachments box.
You should
create outlines by pressing Ctrl + Shift + O after selecting an object and the
text.
You may attach
it in the format of .ai or .pdf.
If you have
finished the entry of product information, press the Enter Sketch button.
Replacement of
the label file after photography is started may incur additional cost. Upload
the file after careful review.
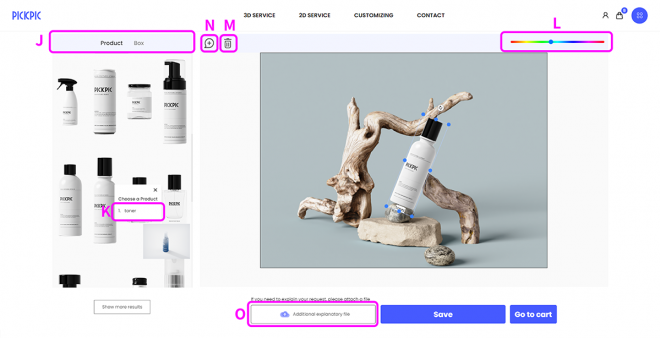
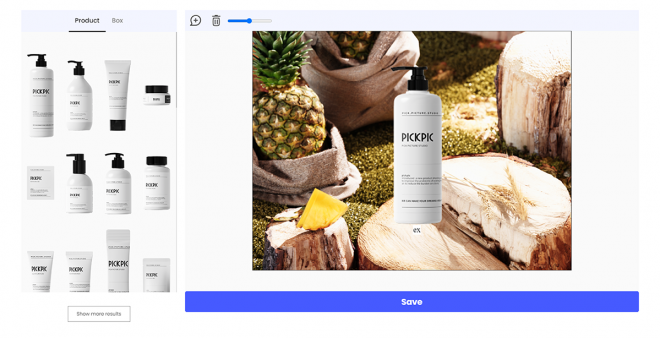
Sketch function
(J) Select a box or a product similar to the product to be photographed from the left product tab.
(K) Select the
name of a product you want to lay out.
Object selection
allows the free adjustment of movement, rotation and size.
(L) You can
adjust the background color by moving the color scroll on the upper right from
side to side.
If products are
overlapped, you should consider the sequence of front and rear products.
When products
are overlapped, you can send a rear product to the front by pressing the rear
product.
(M) You can
delete an unnecessary object by pressing the Recycle Bin button.
As for a part
difficult to explain by means of layout, you can deliver an explanation through
(N) texts or (O) an attached file. Photography where the cap of a product is
opened or a formulation appears is not possible.
If you need a relevant cut, use the customizing service.
Progress of photography and request for modification
Once layout is completed, press the Order button after saving it. We will send an estimate sheet, including a primary photo delivery period, within 24 hours of a weekday, to an email address you entered when you registered membership and the My Page.
Photography
progresses after payment, and you can check the photo at My Page-Order-View.
If you need modification, you may choose the Modify tab and enter matters of request for modification. There is no charge for the first modification. After then, 50% of photography cost for one cut is charged for every cut.
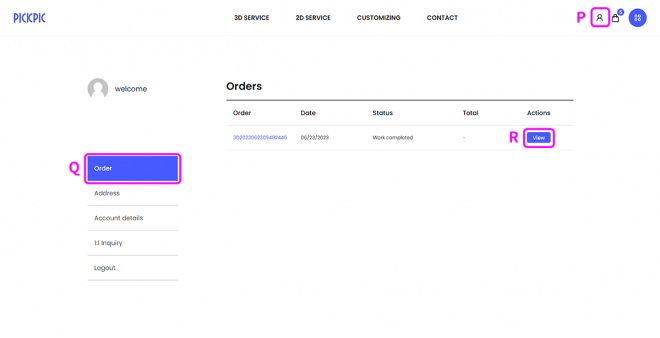
Check order details after clicking on the Order button
Move to (P) My Page, and click on (Q) the Order button.
If you click on
(R) the View button, you can check the status of progress.
We will send an
estimate sheet, including a primary photo delivery period, within 24 business
hours to an email address you entered when you registered membership and the My
Page.
Work progresses
after payment, and you can receive the primary copy within @@ business days.
You can proceed with the check and modification of photos by pressing (R) the View button, and there is no charge for modification up to twice. After then, 50% of photography cost for one cut is charged for every cut.
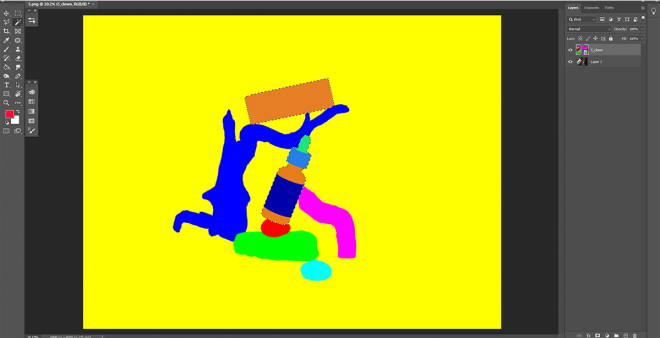
How to use clown
The clown pass is a monochromatic image generated by dividing a rendering image according to parts.
In Photoshop, you can select your desired part easily by placing the original image on the lower layer and the clown pass on the upper layer and selecting your desired part with the Magic Wand tool.